|
|
|
|
|
|
|
|
|
|
|
|
![]()
![]()
![]()
![]()
![]()
![]()
| May The Force Be With Me - Dec 4, 2011 | ||
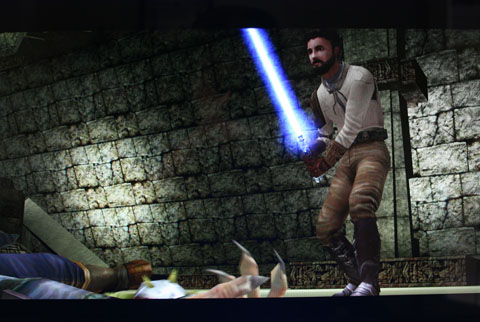
 Last month sometime we were wandering through a Shoppers Drug Mart when I came across Star Wars Jedi Knight 2: Jedi Outcast (JK2). Amazingly it was only $9.99 so of course I had to grab it. Last month sometime we were wandering through a Shoppers Drug Mart when I came across Star Wars Jedi Knight 2: Jedi Outcast (JK2). Amazingly it was only $9.99 so of course I had to grab it.After playing it for a few minutes I realized I had previously played this when it came out back in 2002. Still, I was immediately sucked into it again and before I knew it several hours had gone by. This game is very difficult. I had to resort to YouTube a number of times to look at the walkthru's. As YouTube didn't exist when this came out I obviously had a lot more patience back then. I played the final chapter earlier today and defeated the evil Jedi Desann. After failing badly for a few minutes I looked up the ending to see how to win and despite doing the same strategy kept getting my ass kicked. Then the game glitched whereby the bad guy lost his lightsaber and I hacked away and won. Not the most glamorous way to win but I'll take it. The cool thing about this game is that it's not just a First Person Shooter (FPS). When playing as a Jedi you also get all your Jedi powers (push, pull, mind trick etc.) and use your lightsaber which in addition to using like a sword you can block blaster fire and throw it at your enemies. This adds a nice variation from running around and shooting everything. Despite coming out almost a decade ago the graphics still really hold up well. The nice thing about playing these older games is you can completely max out the graphic settings and your computer won't even break a sweat. In addition, it may be a case of nostalgia (hey you kids get off my lawn), but I tend to think games were better made back then. More care and effort went into the gameplay and storyline and when released they were for the most part bug free. Contrast that with today where it takes six months or more after a release before all the bugs are worked out. So if you want hours of fun for a ridiculously low price you can't go wrong with JK2. Pew! Pew! Pew!
|
| Cube-tastic! - Nov 19, 2011 | ||||||||||
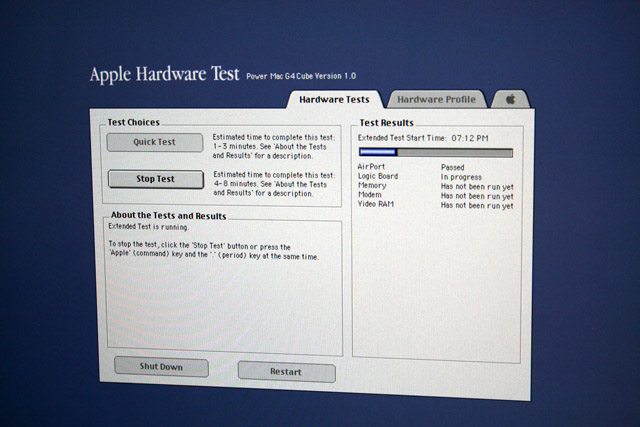
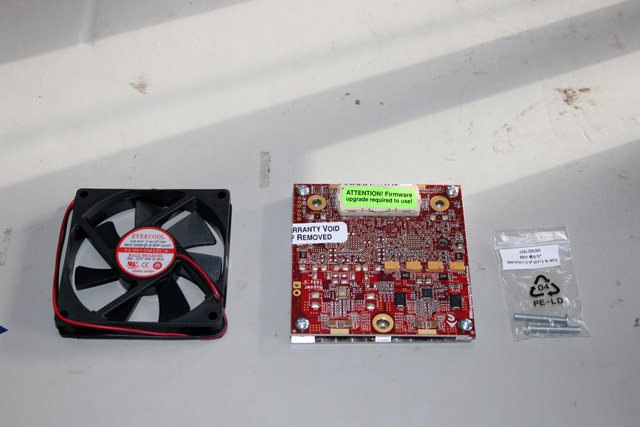
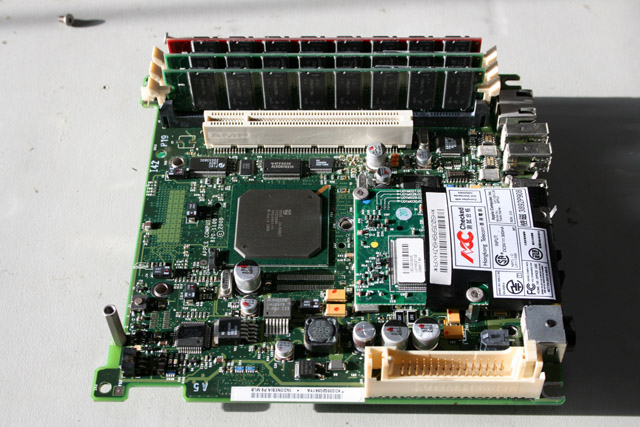
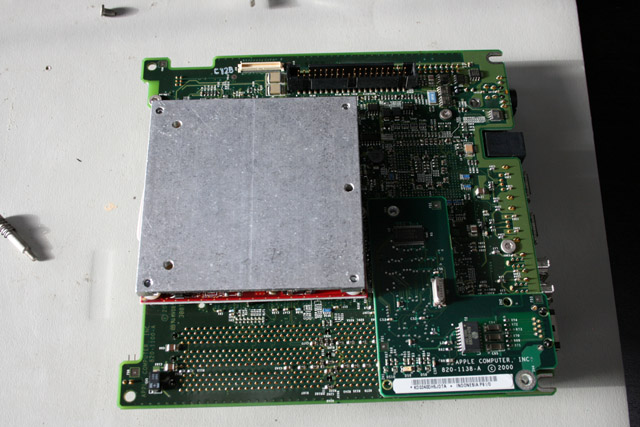
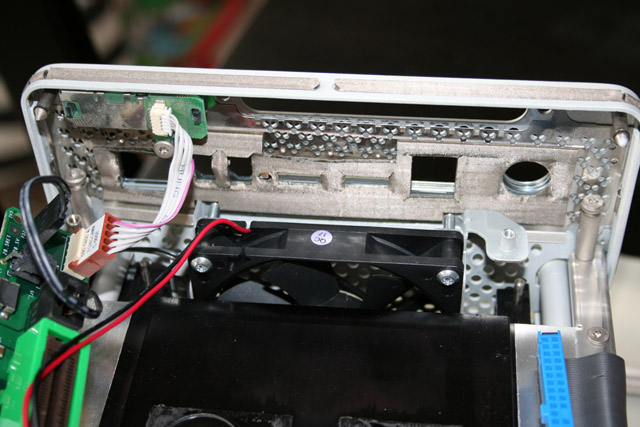
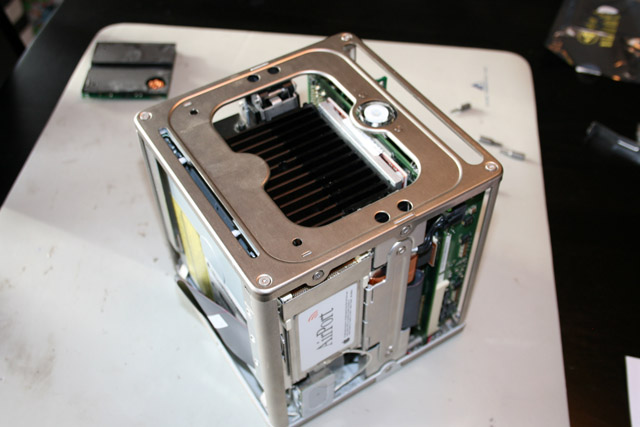
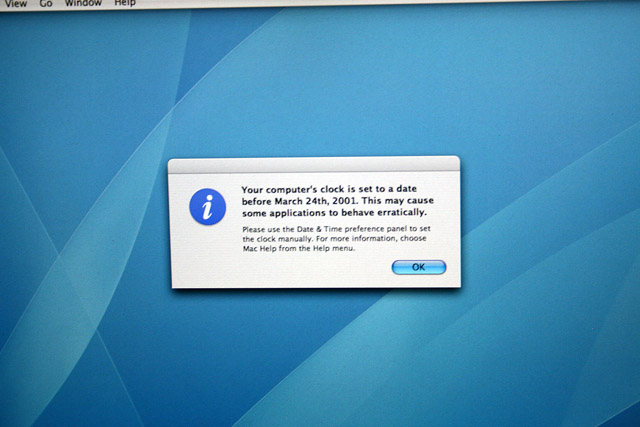
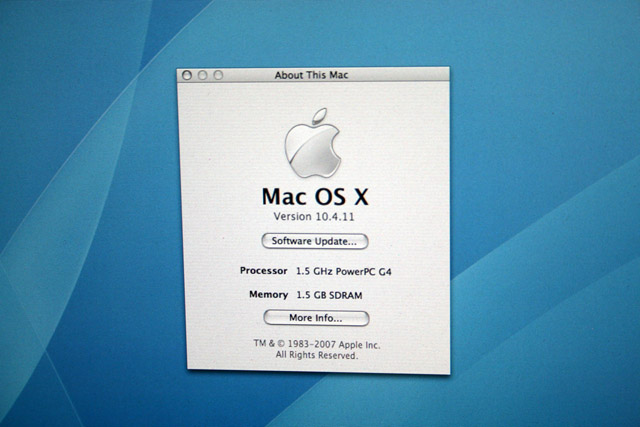
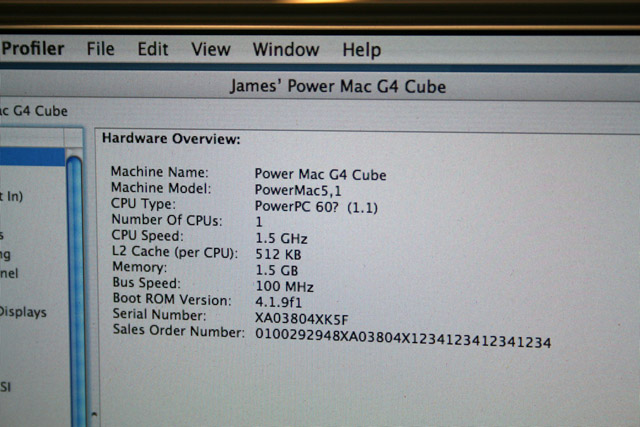
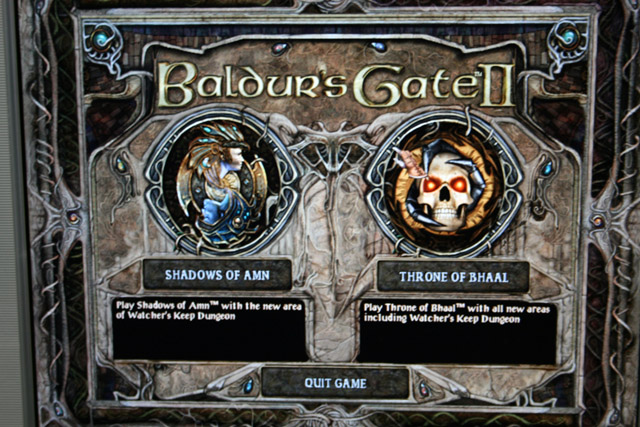
 With everything going on, I haven't had much time to geek out. With everything going on, I haven't had much time to geek out.However I set aside some time this weekend and finally got all my Cube woes resolved. As a quick recap, years ago I bought a Mac Cube to add to my collection. Not long after I ended up buying the Mac version of Baldur's Gate - arguably the best D&D themed computer game of all time. I knew it would have been easier to just get the PC version, but I wanted the novelty of playing it on a Mac. By all accounts it ran best on OS 9, so it made sense to install it on my Cube which could dual boot between it and OS X. So I installed the game and was happily playing until one day the DVD drive crashed. I ordered a replacement drive and after several weeks it arrived and I slapped it in. However now my Cube wouldn't boot at all. Much screaming and jumping up and down ensued. So I bought another Cube off eBay. After a bunch of testing I discovered the problem with my first Cube was that the hard drive had cratered (because it wouldn't even power on I never suspected that was the problem). Not wanting to go through this again I ordered a newer drive that was from around 2006 (versus 2000). Eventually it showed up and I installed it along with a newer DVD drive. I then installed a clean install of OS 9 and then Baldur's Gate - only to have it crash whenever I ran it. At this point I'm wondering why God hates me so much...after a bunch of research I believe the problem was my upgraded Radeon card. However I didn't want to revert to the stock card so I decided to wipe everything and install OS X Tiger. However I didn't have the media (of course). So I had to buy that off eBay and wait several weeks for it to show up. Finally it arrived, I installed it, applied all the outstanding updates, installed Baldur's Gate....and it worked! Wanting to get the best performance I decided to install the Powerlogix CPU upgrade which I bought way back when. This accelerator runs one of the latest PowerPC G4 processors - one made by Freescale, not Motorola. In addition to running at 1.5Ghz versus the stock 450Mhz, because it's a newer design it uses less power and generates less heat. Before starting I also upgraded the memory to the max of 1.5GB, I then ran a hardware test using a Cube specific diagnostic CD. Satisfied that the memory was good I began the upgrade. It took me a few hours as I wanted to be careful and the documentation that came with the card was confusing and incomplete. The major issue was it referred to a VRM bypass cable. Well the package never included one! After a bunch of furious Googling I found out that only the dual CPU version requires this cable. I slapped everything back together, hit the on button and after all of the problems I've had in the past I fully expected it to not boot....a few seconds went by and I got the Apple logo! I couldn't believe it. After OS X loaded I checked and it recognized the new CPU. Finally, a success. There's one minor thing I need to do and that's apply some thermal paste (which the documentation didn't mention but should be done anyway), but after literally years of mucking with this bloody computer I've finally finished it and consider it done. Now off to slay some Dragons!
|
| The Death of Genius - Oct 10, 2011 |
| When I heard news of Steve Jobs death I literally had to fight back tears. I knew when he announced his retirement only a few months ago that things had taken a turn for the worse. So the news wasn't unexpected, but it was no less upsetting. A lot of people will react with bemusement that someone would grieve over the death of a person who in their eyes was just another business exec. For me, part of it was the loss of a childhood icon and part of it was because the same disease that my Dad is currently fighting is what took him. But ultimately it's the realization that the world has lost a visionary who's genius has done more to shape our everyday lives than anyone else in the industry. While it was technically my Commodore 64 that hooked me on computing, it was my first Apple, a Mac IIsi, which made me realize the power of computers. It was that realization over 20 years ago which put me on my career path. A path that has resulted in me living the comfortable life I do today. For that I'll always be grateful.
“Being the richest man in the cemetery doesn’t matter to me … Going to bed at night saying we’ve done something wonderful… that’s what matters to me.” - Steve Jobs |

| USB Key Repair - Sep 8, 2011 | |||||
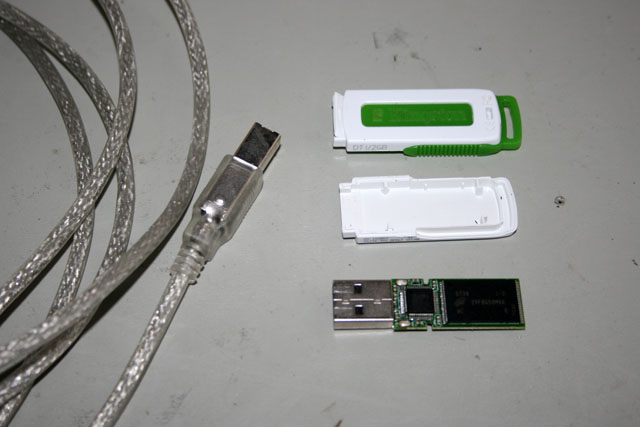
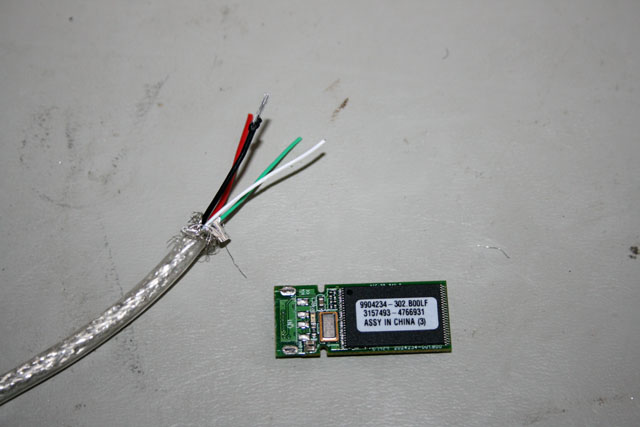
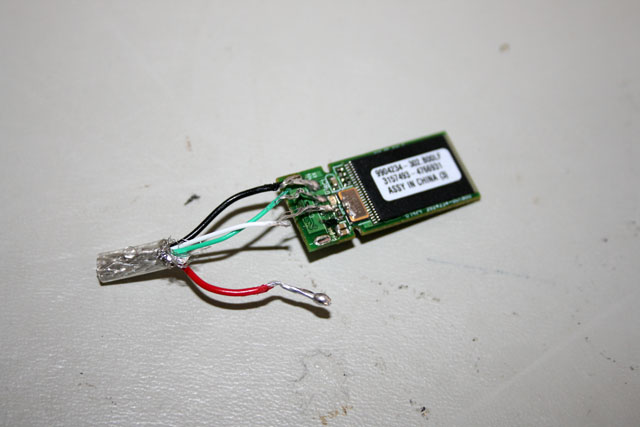
 And the failures keep coming. And the failures keep coming.I was working on my gaming computer a couple days ago and flipped it on it's front to attach some cables at the back. Unfortunately I forgot that I had a 2GB USB stick still connected to the front and it promptly got bent all to hell. Horrified, I bent the connector back and plugged it into my Mac. Relief washed over me when it popped up on the desktop. I did a quick peek at the contents inside and then removed it. I should have taken advantage of that moment in time and copied the data off, because the next time I connected it I got nothing. I then tried connecting it to my PC and I got a message along the lines of 'I see you connected a USB device, but I can't recognize it'. Determined to overcome this setback I did some quick Googling and found out that you can fix this issue by splicing the wires from a USB cable to the contacts on the stick. So I took apart the key, found a spare USB cable, cut the one end off, and peeled back the outer mesh layer to expose the four wires inside. I looked up the wiring diagram for USB and it matched a picture I found online where someone had done this procedure. Just to be sure I used a multimeter to verify the contacts to the order of the wires.
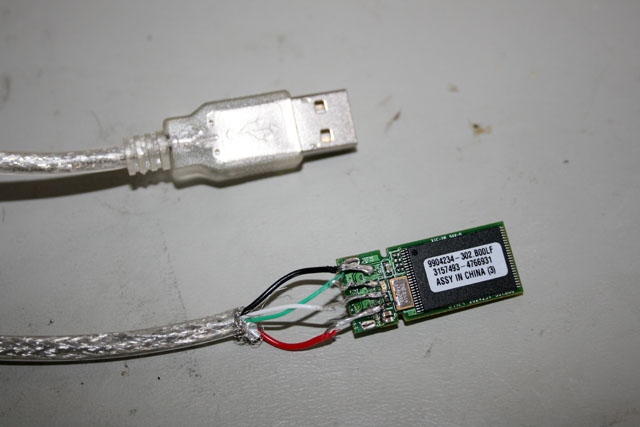
I striped the wires, broke out the soldering iron and started attaching the wires to the contacts. This was very difficult as there's not much space between the contacts. In addition, while the red and white wires were fairly easy to work with, the green and white wires were much thinner and therefore harder to affix. Finally I finished things and took it to my Mac to see if I was successful in my efforts. I got all excited when after connecting it the green led lit up......but then after a couple seconds died out. The Mac didn't recognize it. I plugged it into my PC and got an error message complaining that the USB device was drawing to much power. So I took it out and inspected my handiwork again. Obviously I had a short somewhere. Sadly, while fiddling with the wires I accidentally lifted one of the pads off the circuit board. Goddamn surface mount technology!!! So at this point I was screwed and admitted defeat. This procedure will work, I just didn't have good enough equipment (my soldering iron sucks) and enough practice doing such delicate work. It was an interesting but ultimately futile attempt.
|

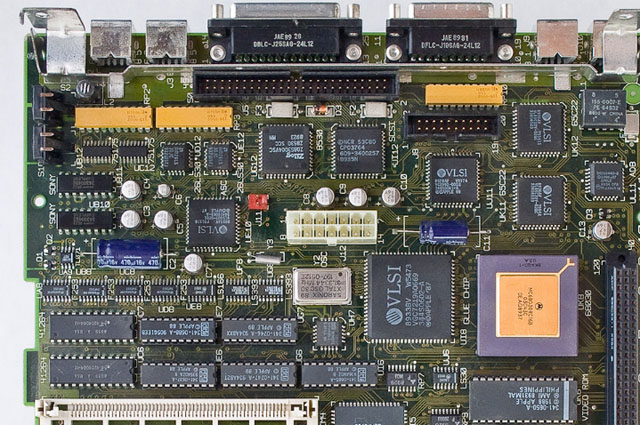
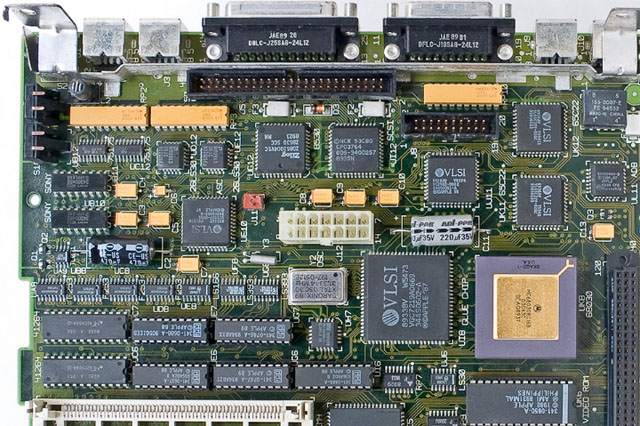
| Two Steps Forward... - Aug 21, 2011 | ||||||||||
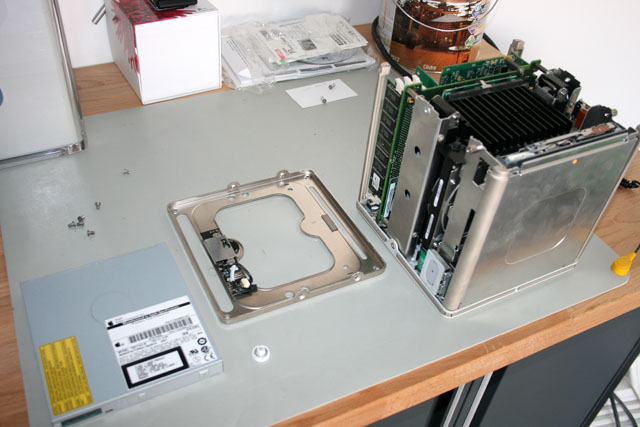
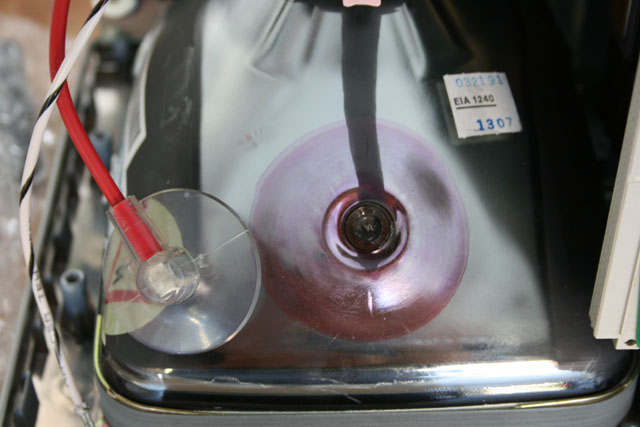
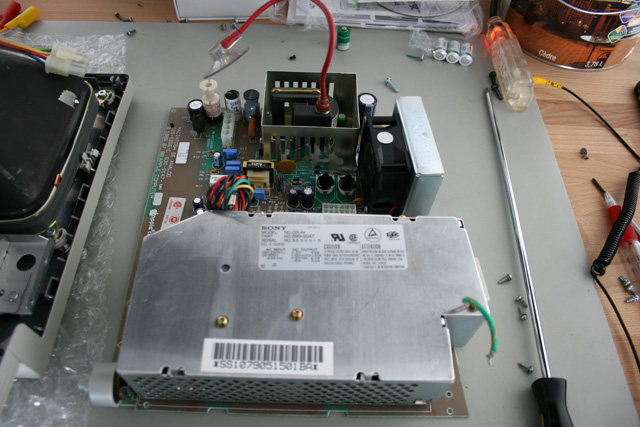
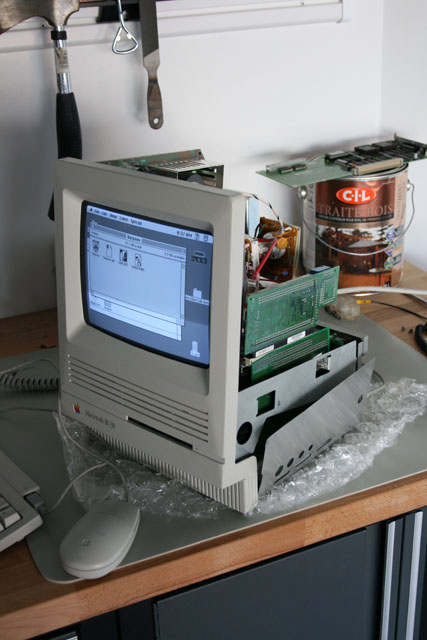
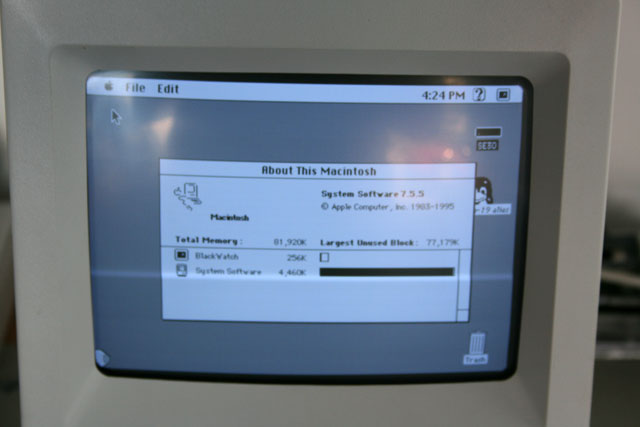
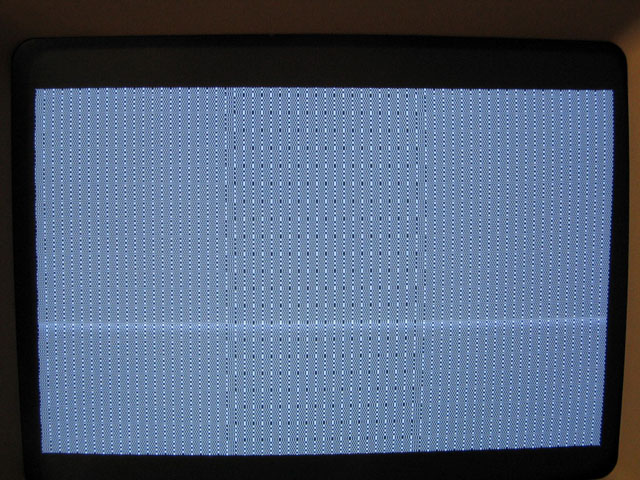
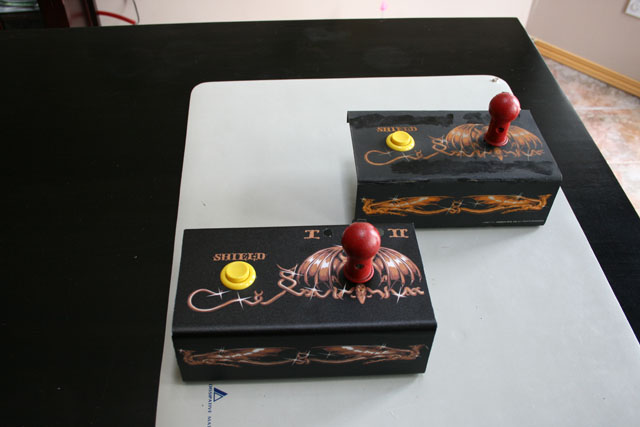
 ...and one step back. ...and one step back.I took advantage of Chris' absence to finish off some more projects that I've been meaning to do. First up was to replace the dead CD drive in my Cube. So I took it all apart, swapped in the new drive, put it all together....and it wouldn't turn on. I mucked with it a bunch but couldn't get it working. So I've now ordered a second cube off eBay to fix the first. It's extremely frustrating putting a working system away for a few months only to have it not work afterwards. Then I took to replacing the power supply in my beloved SE/30. The replacement was one I ordered off my buddy Artmix in Japan. Essentially he has created new supplies with the same form factor but with modern wattage output. (If you look at the serial number of the new supply you'll see that I'm the 11th person he made one for). With my accelerator card installed it was borderline in terms of the load. In order to get the old one out however I needed to take the anode cap off the monitor. This is a very dangerous thing to do. These old monitors carry enough of a charge that can easily kill you. Even leaving them powered off for several days isn't a guarantee you'll be safe. The solution is to ground a screwdriver (before the handle) and short the tube. Thankfully I didn't die and was able to get things apart. I slapped everything together and for an added bonus upgraded the OS to the last supported version for that model, OS 7.5.5. Feeling very satisfied at what I had done so far I connected the Ethernet card which was the last thing to put back before putting the case back on. I powered it up....and....got the dreaded SemasiMac. This is a pattern on the screen which indicates you have major issues. I did a bunch of research and it uncovered the ticking time bomb in these old computers. After 30 years the capacitors on the motherboards will begin to leak. It's not noticeable at first as things continue to operate ok. But over time the corrosive acid will begin to eat away at the motherboard and will eventually ruin it. Feeling nauseous at this point I did a bunch of searching and came across someone who will replace the caps with new Tantalum ones. I tried taking the caps off one of my dead motherboards myself but decided in the end it was to risky to attempt it. These caps are all surface mounted which requires a greater soldering skill than what I have. So I'll be sending my board off this week to get fixed. If everything works out ok, I'll end up sending all my boards from my various Macs to him to get done as well. So while I got a bunch of stuff done, in the end I had two broken systems. Ending on a positive note, I finally finished the second control panel for my Satan's Hollow. So next up is to tackle replacing and refinishing the coin door. Once that's done I can move on to replacing the caps on the monitor and from there order a new cabinet to install everything in.
|
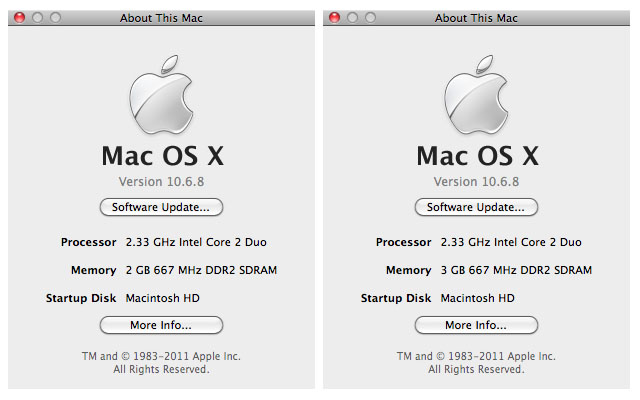
| Upgrade Mania - Aug 12, 2011 | ||||
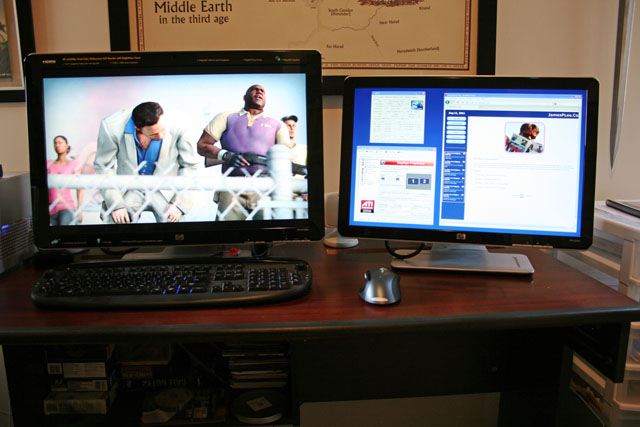
| I've spent the past week or so doing all kinds of upgrades. First up was my iMac. I've had this system for over 5 years now and it's served me well. However having gone through three Operating System upgrades in that time it's starting to get a bit sluggish. I really notice it when Chris is also logged on and has a bunch of windows open on her desktop. So I did some research and was pleased to find out that you can in fact upgrade the memory in an iMac. I found a video on YouTube that showed you how to do it and it was remarkably easy. Essentially you flip the unit over, unscrew a couple of Torx screws, take the faceplate off, press a latch to pop out the memory, replace with the new memory, and put everything back together. It took only a few minutes. The largest supported memory for that particular iMac is 3GB (I had two). So I ordered a 2GB dimm online and swapped it in when it showed up. I've definitely noticed a boost in overall speed. From there I spent some time upgrading my gaming PC. The most noticeable improvement is that I've added a second monitor. After years of searching I finally found the one model I've been wanting in almost mint condition. This all began awhile ago when I wanted a bigger monitor than the 24" one I had. I wanted to be able to run my games at 1920x1200 resolution instead of my current 1680x1050 resolution. The problem is that any monitor made in the past couple years have all gone to a 16x9 format. Basically the same as widescreen TV's. I get why they did it - because you'd be able to watch a Blu-ray at the exact correct resolution. However, being old school, I wanted a 16x10 monitor. I'm not going to be watching movies on my PC, I have a very expensive Plasma to do that, I'll be playing games instead. Therefore I'd like as much vertical resolution as possible.
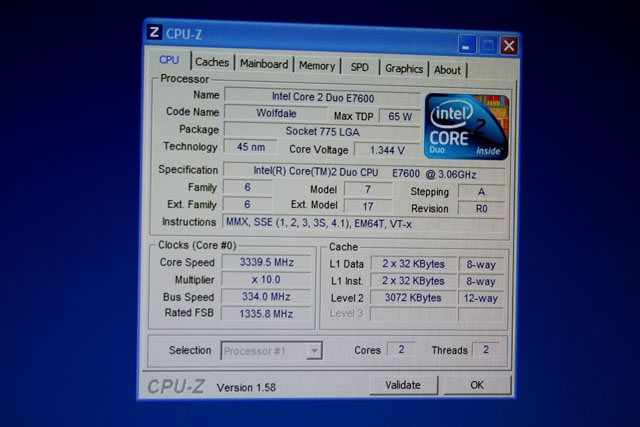
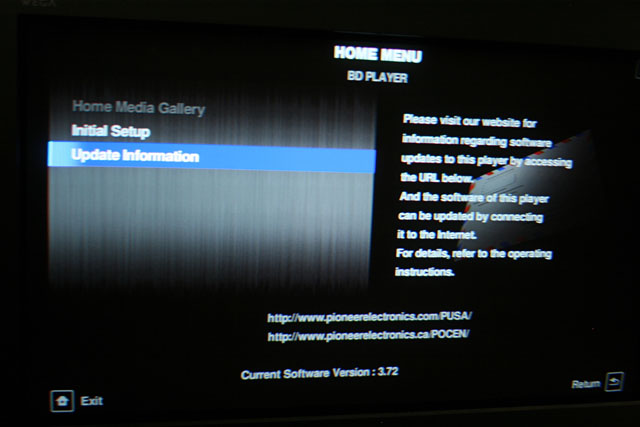
The monitor I was holding out for is the HP w2558hc, which is the bigger brother to my existing HP monitor. It's a 26" monitor with some neat features like an undermount task light, card reader, and remote. Plus being slightly newer it also uses a HDMI connection instead of the older DVI connector. I've found myself really liking having both monitors. It makes it possible to play a game while having other applications open on the second screen, and it makes tasks like updating the website nicer in that I can have Frontpage open on the one screen and my image editor open on the other one. In addition to that, I also gave my system a bit of a speed boost. When I first got my motherboard I played around with overclocking it somewhat but found it kept freezing up so I went back to using the default settings. This time I spent some time actually researching how clock speed, multipliers, and voltages all interact. In the end I was able to overclock my 3Ghz cpu to 3.3Ghz and boost my memory speed from 1066Mhz to 1333Mhz. In fact, at one point I was running completely stable with a 4Ghz cpu speed. However I didn't feel overly comfortable running so much outside of specs so I bumped things down. And if that wasn't enough, I noticed that there was a new firmware update for my Pioneer Blu-ray player. So I updated it from version 3.71 to version 3.72. I'm on a roll right now, I think I'd upgrade my toaster if it was possible! Or is it? |
| Grease Monkeying - Jul 24, 2011 | ||||
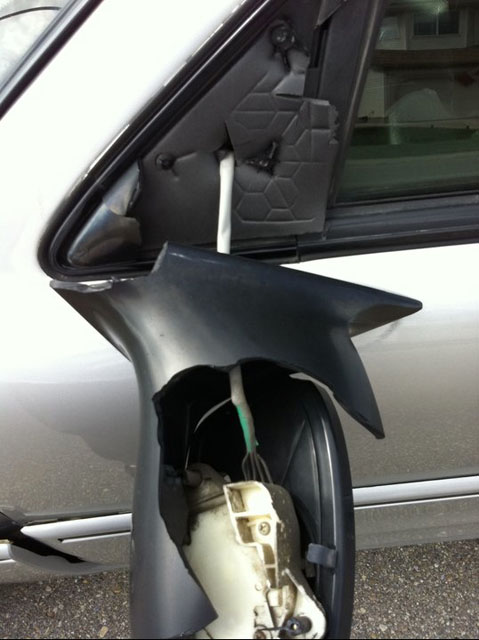
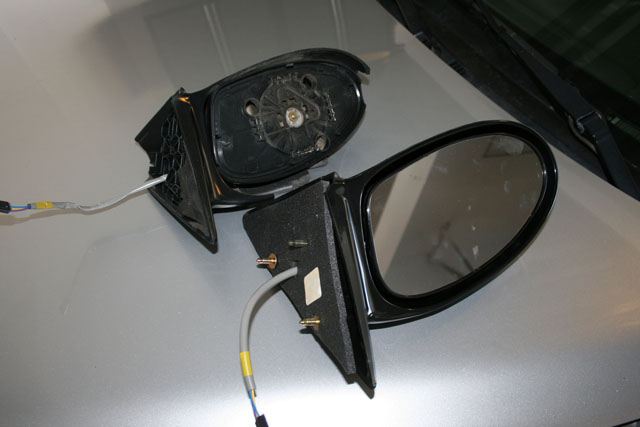
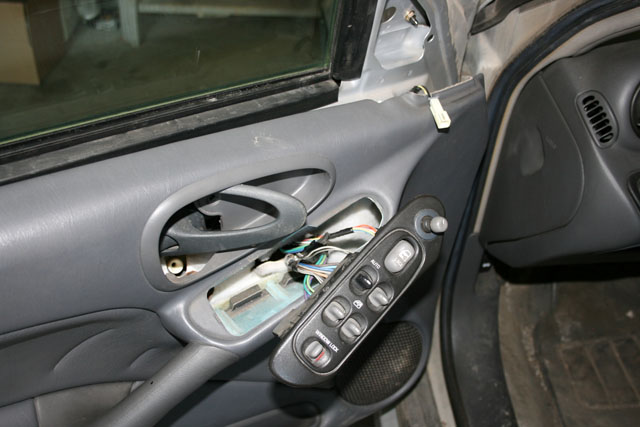
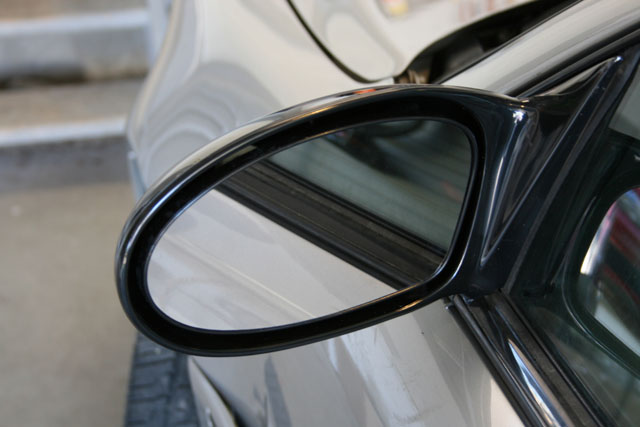
It sat that way with the mirror dangling, looking like a very sad car since then. However Kim is borrowing it to go camping so we decided to get it fixed. We looked online for a replacement mirror but none of the one's we found would ship to Canada. In the end I went to the dealership and bought one there. Today I tackled replacing it. Now for most people this wouldn't be a big deal. However for me it is as I've never worked on cars. Whenever I walk through the neighborhood I pass garage after garage that has some vehicle being worked on. These guys never seem to actually finish anything, but they're working away nonetheless. Working on cars is engrained into every young boy growing up. Except for me. Give me a circuit board, programming algorithm, electrical wiring etc. and I'm at home. But tinkering with vehicles is unknown to me. Other than driving them, the most I've ever done previously was to change a tire. So it was with much satisfaction that I was able to do this task. I did some quick Googling and found out that in order to get the mirror off you have to remove the door panel. How the hell do you do that? Turns out that on Grand Am's the panel is held on by four screws cleverly hidden from view. Once the screws were out I was able to pop the panel off. That was a bit nerve wracking as I really had to yank on it. I was then able to unhook the power cord (these were power mirrors), unscrew the broken bolts, put the new mirror on, screw it in place, replace the padding, reattach the power cord, reseat the panel, screw it together, test that the mirror worked and crack open a beer.
Seeing as I'm almost a certified mechanic now maybe I can tune the transmission, replace the brakes, and upgrade the engine to a V8. Can't be much more difficult than replacing the mirror right? Right?!?!? |
| Power Supply Swap - Jun 30, 2011 | ||||||||||||||||||||||||
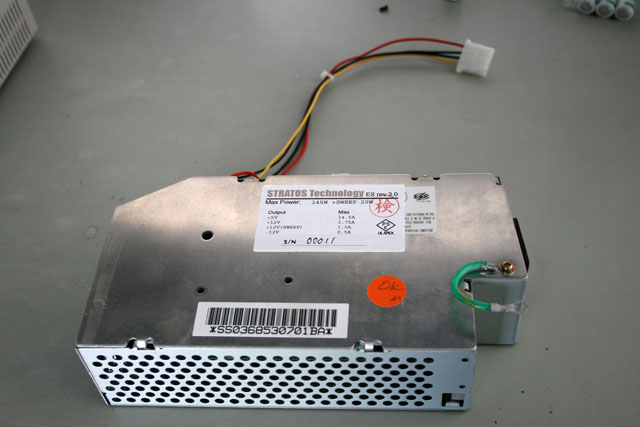
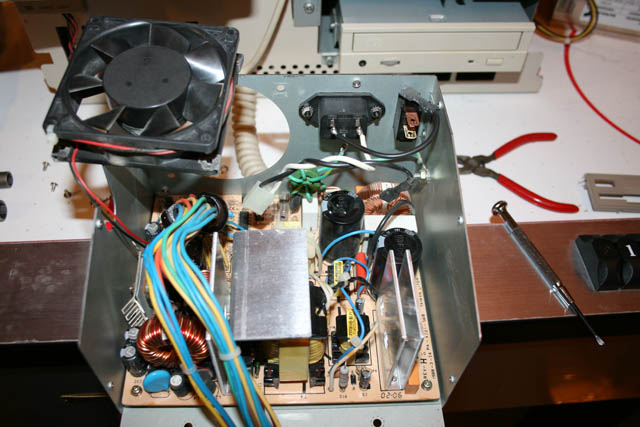
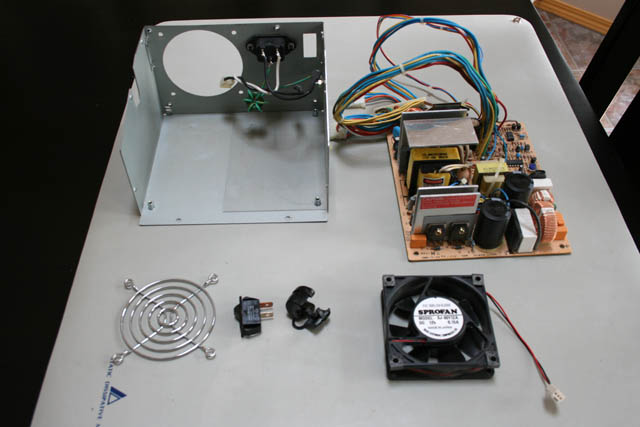
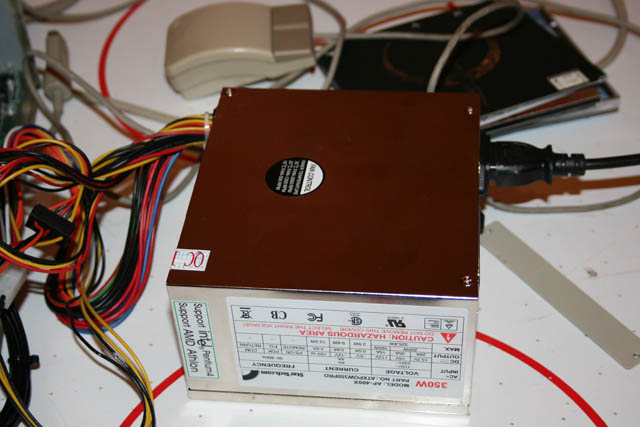
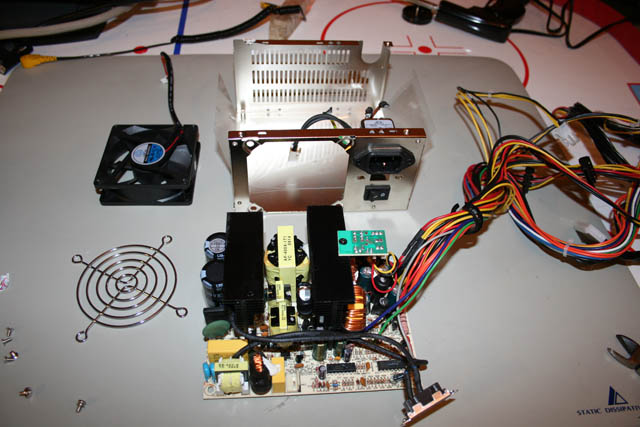
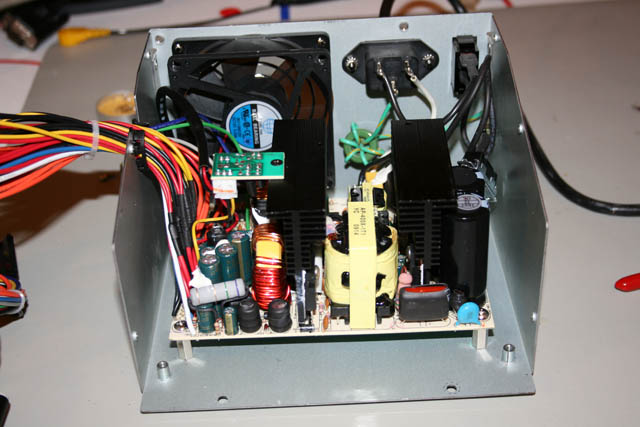
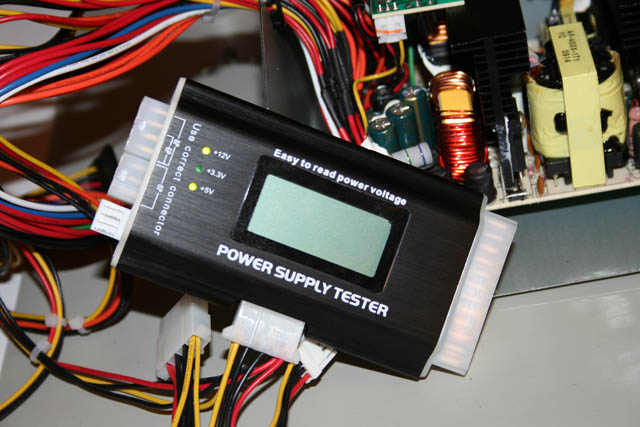
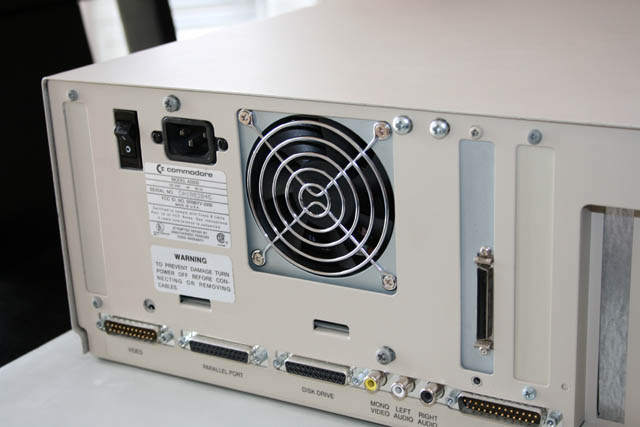
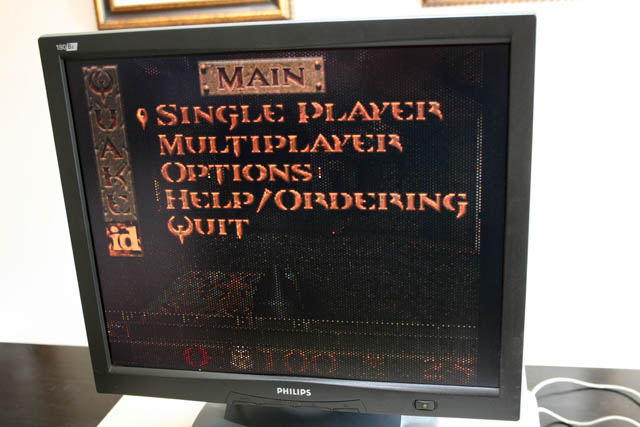
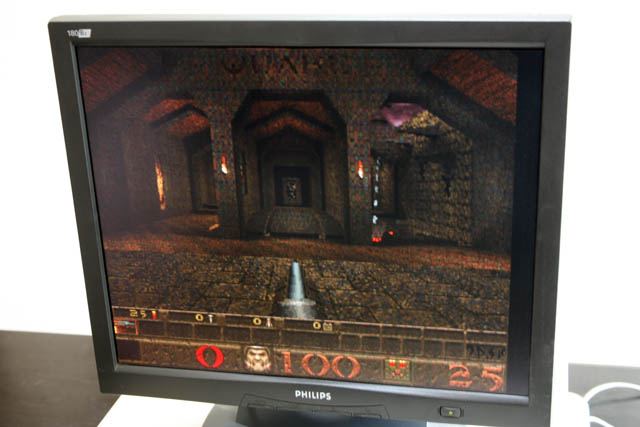
 Back when I was having problems with my Amiga 2500HD, on a suggestion from an Amiga forum member I bought an old style PC power supply (PS). Back when I was having problems with my Amiga 2500HD, on a suggestion from an Amiga forum member I bought an old style PC power supply (PS). One of the issues with this model of Amiga is that the supply that came with them was never designed to handle the loads of faster and faster accelerator cards. By simply changing a jumper on the motherboard you can use a standard PC supply and get a much needed boost in wattage. The biggest issue was how to wire it as the wiring standards are completely different. Thankfully I found someone who had done all the hard work and sold conversion kits. So I bought the wiring kit and a new supply, hooked it all up and it worked just fine. The only problem was I had to have the computer cover off and the supply sitting next to it as it wouldn't fit properly in the case. None of the screw mounts lined up and the location of the fan and on/off switch was completely different. So I thought about it a bit and again acting on the suggestion from a forum member decided to simply put the contents of the new PS into the case of the stock PS. The first step was to open up and remove the contents of the new and old supplies. Then I noticed that the new PS circuit board was much smaller than the old one and the mounting holes didn't line up. So I had to drill through the bottom plate and install some new standoffs. Once that was done I then tackled connecting the leads from the on/off switch to the circuit board. Unfortunately the old connector wasn't compatible with the new board so I ended up just snipping the wires off and soldering them directly to the contact pins. Then I mounted and reconnected the cooling fan, plugged in the power cord, flipped the switch and checked for smoke. Once I was satisfied that it wasn't going to catch on fire I connected my power supply tester and was happy to see both +5V and +12V indicators lit up. I then put the cover back on, put the computer case back on, screwed everything back together and fired up my system and played a quick game of Quake. Best of all, I only managed to shock myself a couple of times during the upgrade process :)
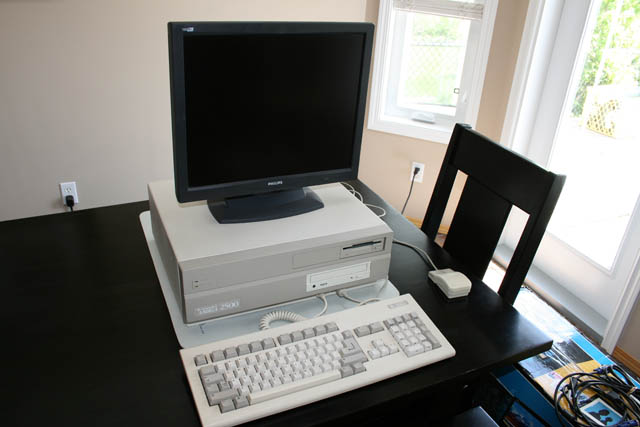
This system is now done. It's as upgraded as technically possible for this model. I've managed to create the holy grail of Amiga systems. A fully maxed, 68060 powered, internet connected throwback to the golden age of computing.
|
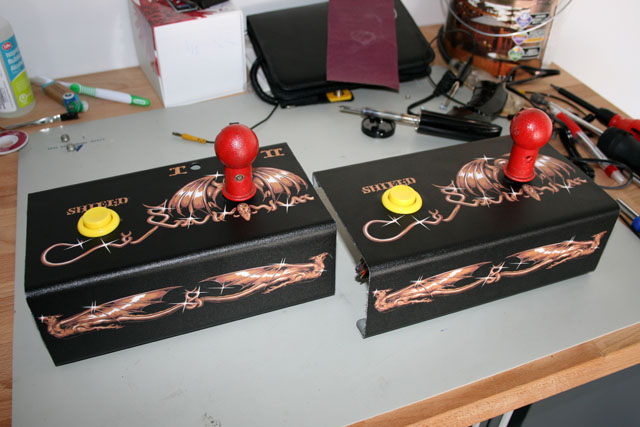
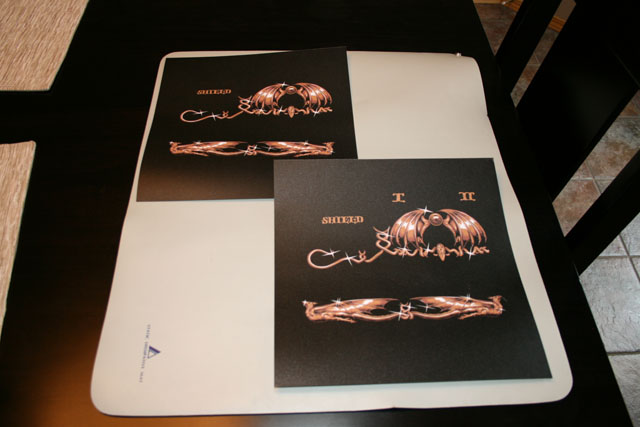
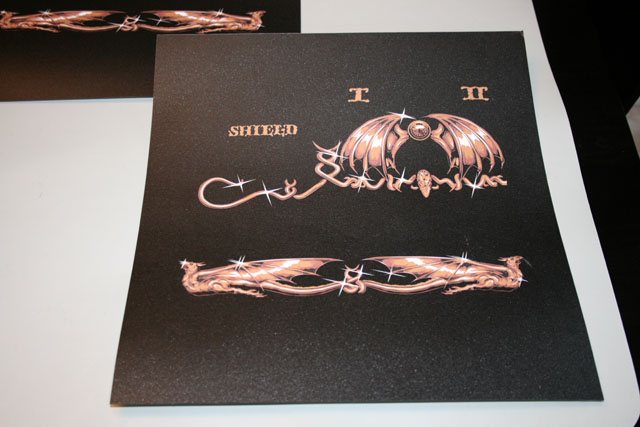
| Satan's Hollow Restoration - Jun 19, 2011 | ||||||||||
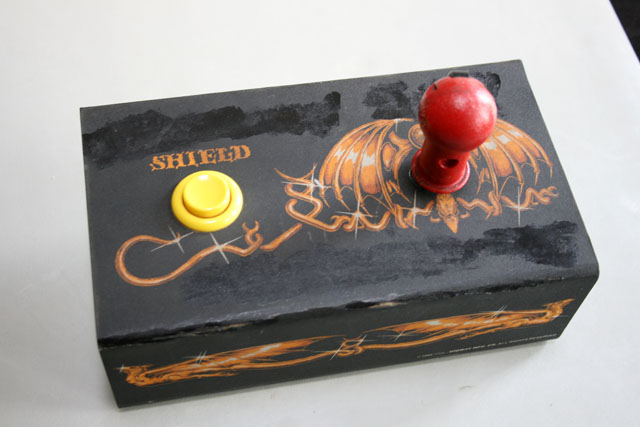
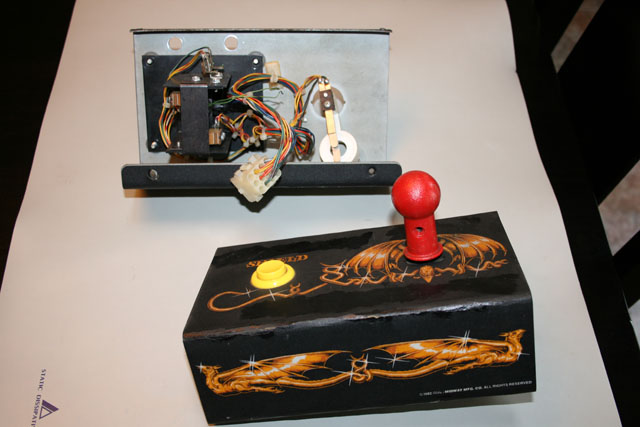
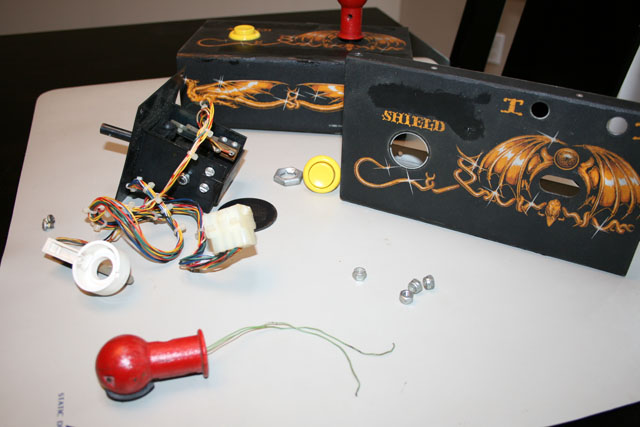
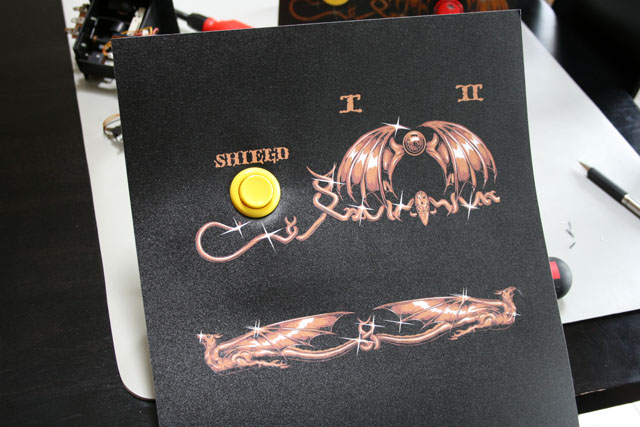
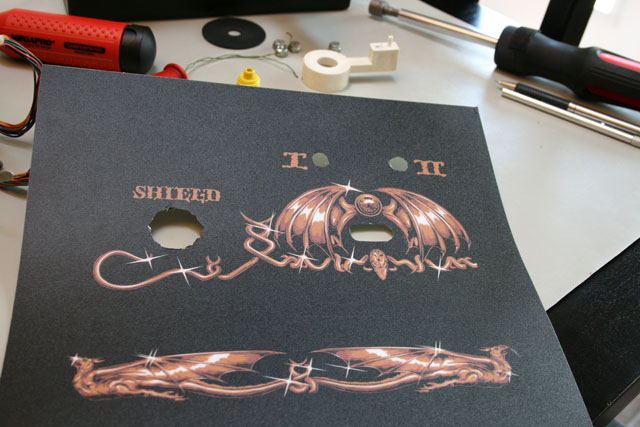
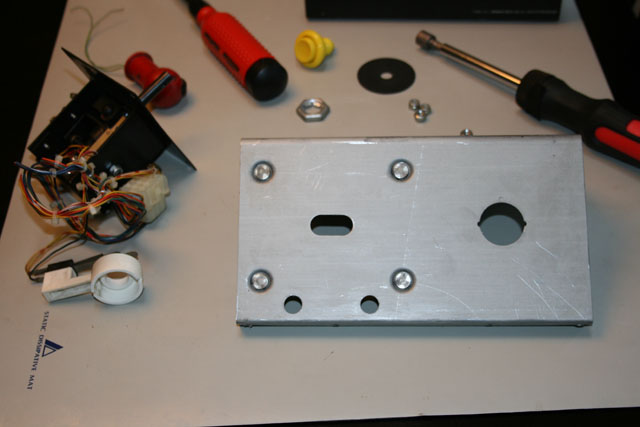
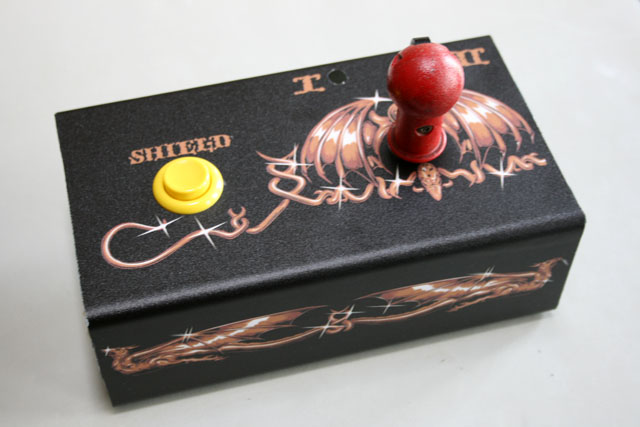
| When I got my Satan's Hollow cocktail I had high hopes. All my other arcade games came in mint or near mint condition so this was going to be my first fixer upper. Fast forward a year and I haven't got a lot done. I just don't have the time it seems. Still, I've managed to make some progress. As detailed previously in Tech Corner the system was in pretty bad shape when I got it. It worked but that was about it. The cabinet was beat up and smelled moldy inside, the glass was scratched all to hell, and the control panels looked like crap. So far I've managed to get a new glass top and clips, a new top overlay, new molding, and a capacitor replacement kit for the monitor. A few months ago I also received two new control panels. I was ecstatic when I got them as they are really rare. The one thing missing was a replacement overlay for the control panels. I had given up hope as everything I came across was for the upright cabinet. It seems my sit-down version is pretty rare. Then one day I came across a listing on eBay for the upright version and asked the guy if he could make one for the cocktail version. He said he could if he had the dimensions so I worked out a deal to send him one of my control panels which he could use as a template. In the end I got my overlay and he got a new template to sell. So I'm responsible for getting this out into the market :) This weekend I buckled down and tackled replacing the overlay. The first step was disassembling everything. I figured out how to remove the Shield button and the bottom of the joystick assembly but I didn't know how to remove the joystick itself. It had two screws holding it onto the shaft but they were an odd type. At first I thought they were star screws but they had this bump in the middle. I did a bunch of Googling and found out that I needed a security star key set. Luckily the guy at Home Depot knew what I was talking about and told me where to find one. Once everything was apart I took to removing the old artwork. This was the worst part of the process and I spent at least two hours on it. There's a reason that although beaten up the original overlay was still affixed almost 30 years later - they used really really strong adhesive. It took me forever to get everything scraped off. I then used some Goo Gone cleaner to remove the last of the sticky bits. Finally I wiped everything off to remove any dirt and used some sandpaper to score the metal. Putting the new artwork on was nerve wracking. You only get one shot at it. I started by using the locking nut for the Shield button as a rough hole sketch and using an Exacto knife cut it out trimming it until it was circular. I then put it on the metal plate, put the button through, and tightened it all up. With that as my anchor point I was then able to peel the backing off and slowly start pressing on the new overlay. I used a hard roller to smooth out any bubbles and then with the Exacto knife trim off the excess around the edges. I put all the components back together and was floored at what I had done. It looked amazing! Yes the colors weren't an exact match with the original being slightly more vibrant but I was incredibly happy. This was my first real step in completing the restoration. Now I just have to do this all over again for the second panel.
|
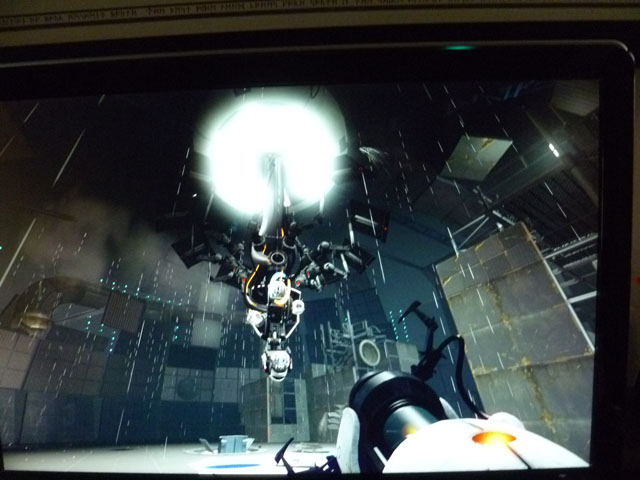
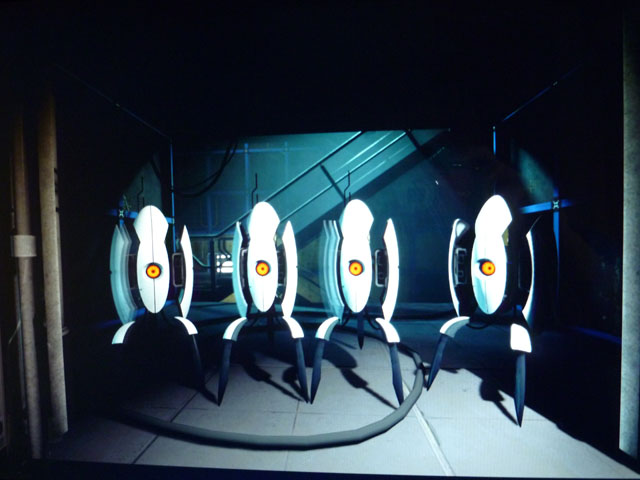
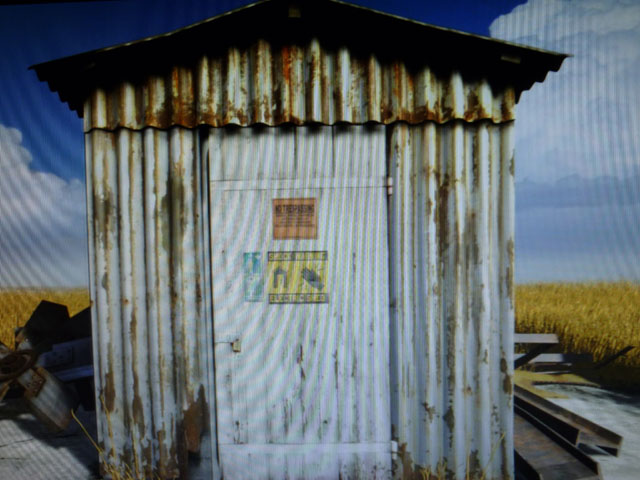
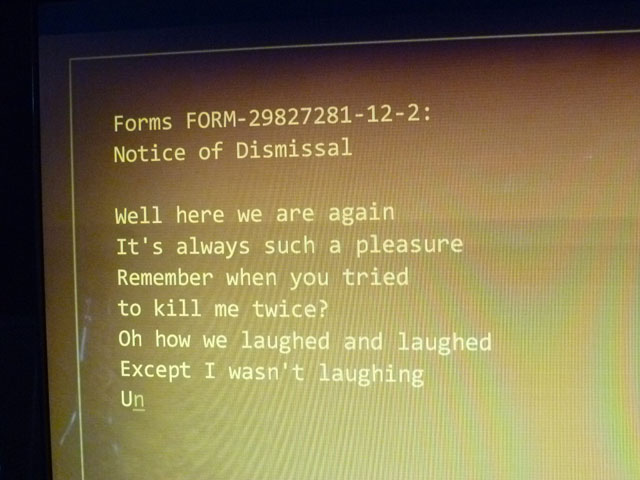
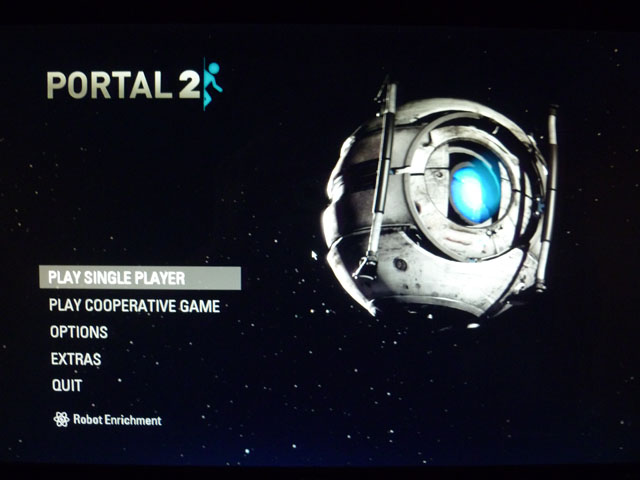
| Portal 2 - Jun 7, 2011 | ||||||
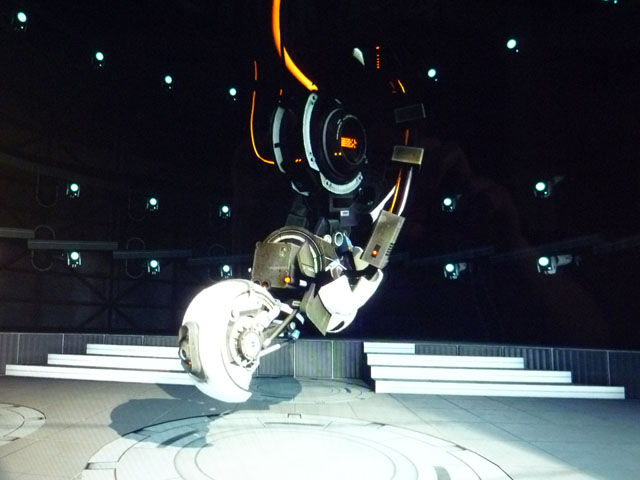
Portal was bundled with Valve's Orange Box which consisted of HL2: Episode 2 and Team Fortress 2. I bought the package to play Episode 2 and didn't bother installing Portal for several months afterwards. I had no idea what it was and didn’t really care. I'm glad I finally did because playing it was one of those priceless gaming experiences. Sitting in the first test chamber with no instructions and thinking 'What the hell is this all about?'. For those who haven't played it I'll quickly summarize why it's so great. Essentially a puzzle game, you must figure out how to escape from various rooms with only your Portal gun. The left mouse button shoots a blue portal and right mouse button shoots an orange portal. That's it in a nutshell. Whatever goes through the blue portal comes out the orange one. You can also jump and pick up certain objects. But for the most part it's you figuring out where to place the portals to escape the room you're in. It wasn't really hyped or advertised when it came out and was one of those titles that caught on via word of mouth when people started discovering what a joy it was to play. Can you tell I'm a huge fan? Fast forward a few years and the long anticipated sequel has been released and I just finished playing it. Overall I enjoyed it immensely but preferred the original in some ways. The original was a relatively short game - basically an expanded upon demo. So when they made the second one they probably felt they had to make it longer to justify charging for it (the original one was essentially free). However I felt there were a couple of chapters that could have been dropped as it started to get a bit repetitive by the end. Still, that's a minor quibble. Game play is for the most part the same, with a few new elements thrown in. Graphics are almost identical - but that's a good thing as the original had a very unique look to it. Game balance is spot on - difficult in parts but never frustratingly so. I only resorted to the walkthroughs in a couple of places that I'm sure if I had more patience I would have figured out. Easily the best $29.99 I've ever spent. Here are some screenshots of the final scenes:
|
| This Is Why I Drink - May 20, 2011 |
 This has been a frustrating week. This has been a frustrating week.First off, I setup a new virtual server. The point was to have it host two physical boxes that are on ancient hardware, slow, and out of warranty. So I installed and configured the server, put it in the server room and was looking forward to achieving what should have been a simple task. The first server I tried to virtualize converted ok, but then the database on it wouldn't start. So I'm now having to attempt it again this weekend. The second server I tried to virtualize converted ok, but wouldn't even boot - complaining about a disc error. So I ran chkdsk on the physical box and it found and corrected a bunch of errors. But I got the same error the second time I tried virtualizing it. Time wasted? A couple days. Moving on...I upgraded our backup server from Windows 2003 to Windows 2008. The upgrade itself went fine so again, I was looking forward to checking what should have been a simple thing off my to do list. I started up the backup console and it wouldn't run. After investigating the issue I determined that the upgrade screwed up Java which the console needs to run. Ok, so I'll uninstall Java. Nope. It wouldn't uninstall and gave me a cryptic error message. I research that and Oracle who owns Java had a technote that said 'they were aware of the problem'. Awesome. So I revert back to the 2003 image I made before upgrading. I uninstall the console and Java completely and then upgrade to 2008 all over again. Reinstall the console, reinstall Java, and it works! Yay. Except that when I tried to actually do any backup operations it would fail. The tape jukebox would keep marking itself offline. So I delete the jukebox and recreated it from scratch. Tried a backup and now the jukebox stayed online but the tapes wouldn't load. Did some investigating. Turns out when I recreated it the tape drives reverted to using CDI mode (obviously). So I turned that off. Kicked off another backup and now the tapes loaded but as soon as it started writing to tape it'd mark the tape as full and stop. (Yelling, screaming, jumping up and down ensues). More investigating followed. Turns out you can't use the vendor (Dell) tape drivers on Windows 2008, you have to use the generic drivers that come with the operating system (even though they're over a year older). Revert to the generic drivers and everything finally looks like it's ok. Time wasted on what should have been a simple process? Several days. And then most annoying of all - my Amiga system that I spent weeks getting to work (chronicled in last years Tech Corner) and had carefully set aside on a shelf afterwards wasn't working again when I fired it up. Why? Who the hell knows. Time likely to be wasted? Countless hours. I think I hear a Scotch calling my name... |
| Browser Smackdown - Mar 30, 2011 |
 If you're still surfing the net on the browser that came bundled with your computer, you might want to consider upgrading to a new one. If you're still surfing the net on the browser that came bundled with your computer, you might want to consider upgrading to a new one.As new web standards are adopted you increasingly run the risk of websites not being properly formatted on your old browser. More importantly, your browser is the number one attack vector for infecting your system with viruses or spyware. Therefore it's important to keep up to date. All major players have recently upgraded their products - here is a quick overview of what's available. Internet Explorer Still the most widely used. Despite a number of upgrades IE was starting to show it's age. A number of websites have even dropped support for older versions.
Having installed and used all of them over the past few weeks I believe both Firefox and Chrome give the best browsing experience. Firefox has more 3rd party add-ins, while Chrome is faster overall. Either one is a winner. |


| DTS Bonanza - Mar 12, 2011 | ||
 I recently got lucky and came across an terrific listing of DTS laserdiscs on eBay. I recently got lucky and came across an terrific listing of DTS laserdiscs on eBay.In addition to them all being DTS titles, most were also sealed. Naturally I had to add them to my collection. I've previously discussed why I love Laserdisc (LD) so much: Retro factor, packaging, titles and commentary not available on DVD etc. But I haven't really gone into the technical advantages of LD over DVD. As to audio advantages, DTS LD titles came out relatively late in the game, but they were audio nirvana and therefore some of the most sought versions. These titles carry a price premium over other discs, even over those with AC-3 Dolby Surround. The reason is they just sound so much better than any other Laserdisc encoding technology and even better than DVD. An exhaustive overview can be found here, but really it boils down to a higher bitrate: Dolby Digital on DVD - 384kbps or 448kbps DTS on Laserdisc - 1.235Mbps Three to four times the audio resolution is a significant improvement. Outside of a demonstration disc, my first DTS title was Nightmare Before Christmas and I was absolutely blown away by how good it sounded. The other benefit is that you don't need special hardware to decode them like you do with AC-3 Dolby Surround releases. They will play just fine on any modern receiver. Albums are still being released on Vinyl, and SACD releases still are trickling out. Maybe Laserdisc will make a comeback as well? One can dream...now I think I'll go and fire up Pulp Fiction.
|

| Amiga Forever - Feb 18, 2011 | ||||||||||||
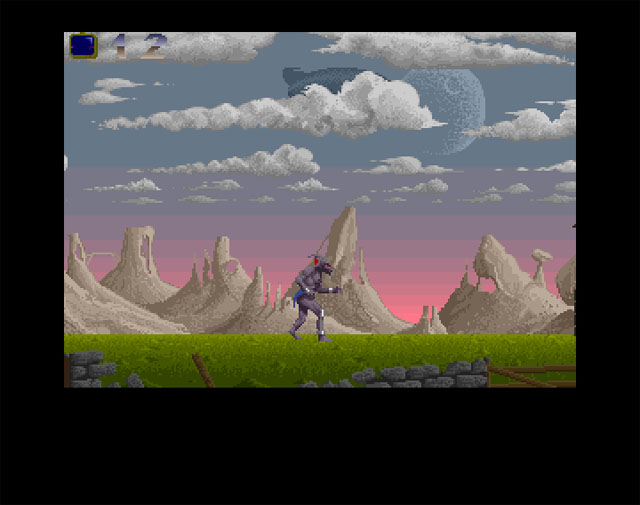
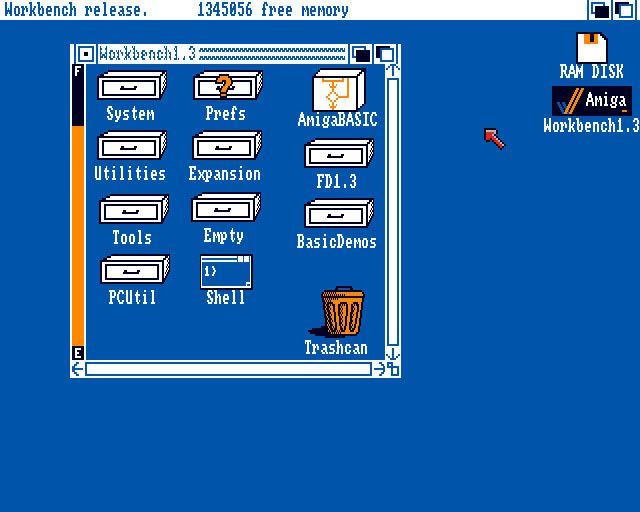
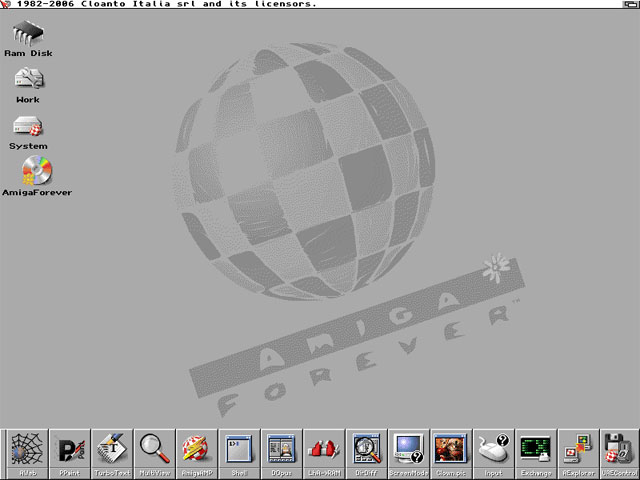
| I've managed to accumulate a number of Amiga systems and software over the past few years. It's been a delight collecting some of the games that I used to enjoy playing way back when. I love going through the packaging and manuals and time warping back 20 years or more. However because the hardware and software is so old it's always hit or miss whether I'm actually able to play these games. Sometimes they won't run because of the machine I'm running it on. When the Amiga models such as the A1200 came out with a 68020 processor a number of games wouldn't run properly because they were written for the earlier 68000 based systems. That was always one thing that annoyed me about Amiga's. By comparison I could run almost any piece of software written for a Mac on almost any Mac machine. Sometimes they won't run because one of the required disks has a write error. This is increasingly becoming common. Of course when you buy vintage software off of eBay it's always sold 'as is' due to the age of the items. Even copying functioning discs to backup discs doesn't always work because the blank floppies you get are just as old. They stopped making floppy discs a number of years ago. Now because of the issues I've been having I've decided to revisit emulation. I knew about emulation way back when I first started collecting. I had played with a few for a little bit but soon dismissed them as I wanted to run the real deal. Perhaps the best emulator on the market is Amiga Forever which I bought today for $20 and fired it up. There are a number of websites that have libraries of Amiga software in .adf (Amiga Disk Format) format. You simply download the files, double click on them, Amiga Forever loads, and in seconds you're blasting away at aliens or slaying dragons. The sound card even mimics the floppy drive clicking noise of the real machines! You can also run different versions of Workbench as well as different machine models. Even better, the program makes it easy for you to take screenshots:
Time to kick some butt in Shadow of the Beast! |


| Return to the Dungeon - Jan 24, 2011 | ||
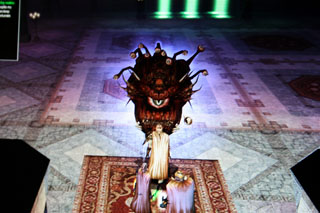
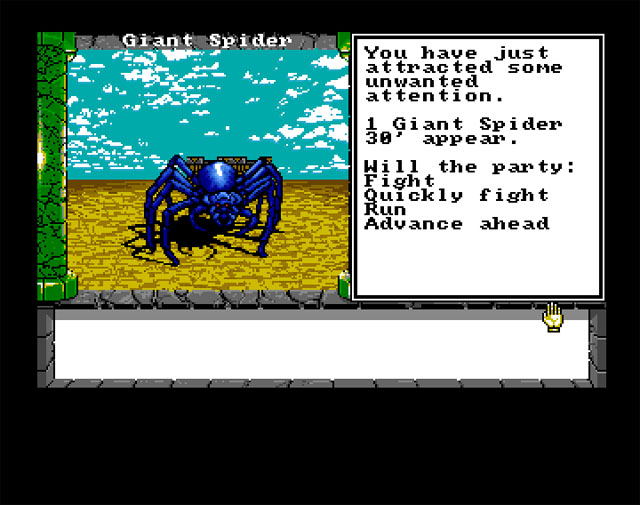
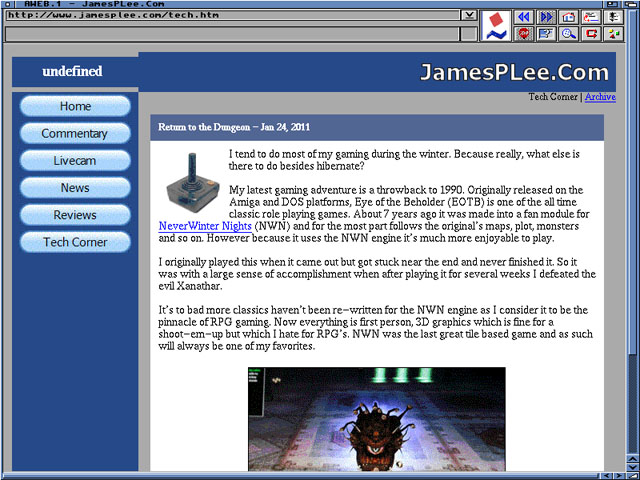
| I tend to do most of my gaming during the winter. Because really, what else is there to do besides hibernate? My latest gaming adventure is a throwback to 1990. Originally released on the Amiga and DOS platforms, Eye of the Beholder (EOTB) is one of the all time classic role playing games. About 7 years ago it was made into a fan module for NeverWinter Nights (NWN) and for the most part follows the original's maps, plot, monsters and so on. However because it uses the NWN engine it's much more enjoyable to play. I originally played this when it came out but got stuck near the end and never finished it. So it was with a large sense of accomplishment when after playing it for several weeks I defeated the evil Xanathar. It's to bad more classics haven't been re-written for the NWN engine as I consider it to be the pinnacle of RPG gaming. Now everything is first person, 3D graphics which is fine for a shoot-em-up but which I hate for RPG's. NWN was the last great tile based game and as such will always be one of my favorites.
|